
This post contains affiliate links. If you use these links to buy something I may earn a commission. You can read my full disclaimer here.
I absolutely love sewing, but I absolutely dislike the process before I sit in front of the machine. Printing patterns at home is an amazing concept, but it adds to the time of preparation. So I usually buy my A0 prints from a print store, and then trace my size or the graded size to some pattern paper and only then cut the fabric. This process, especially if you have lots of pattern pieces can take hours and days. Also, it’s expensive and takes a lot of space!

Recently, I discovered the concept of using a projector in your sewing. The idea is simple, you project your pattern into a cutting mat, and using a rotary cutter – trace the pattern on the mat – either directly to your fabric or to a paper. Sounds incredible!
But…
The printing, taping, cutting paper and tracing, is being replaced by: setting the projector, connecting and calibrating.
The lucky ones who have a sewing room can mount the projector on the ceiling permanently and then they only do that once. The ones with a bigger budget can buy an Ultra Short Throw projector that you don’t have to mount, but just place on the same table.
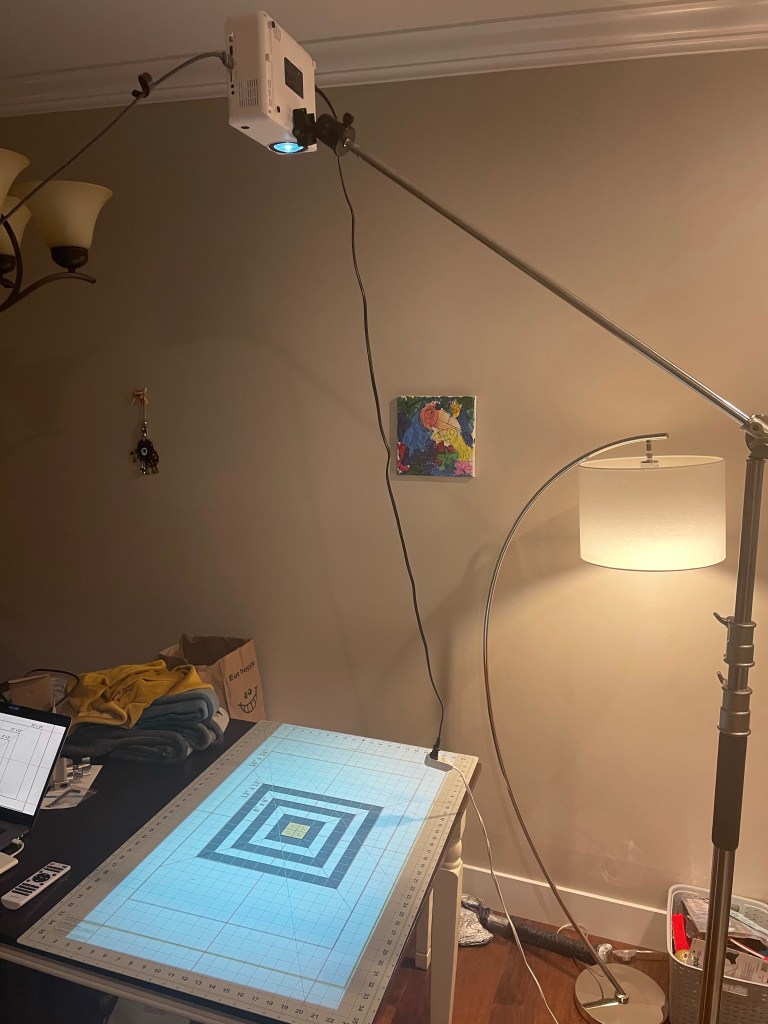
I’m neither of those people, so I opted for a tripod (or boom) stand, a relatively cheap projector and cutting on my dinner table.
Where to start
First, do your research! Even if you go with the more affordable options, you still spend a relatively large amount of money. The cheaper projectors out there may be good enough to watch a low resolution movie when you’re camping, but not sharp enough for patterns. You’d need an at least 720p native resolution. All projectors will state that it’s 1080 compatible, but for patterns what’s important is the native resolution.
Another important thing to take into account is the throw distance. If it’s extra long – you may not have enough space to place it in your room.
I also checked the weight of the projector because I knew I’m going to place it on a stand.
The best way to start your research is to join the Projectors for Sewing FB group that has a crazy amount of information about different projectors, people’s setups, calibrating guides and files and much much more!
The only thing that I found with this group is that most participants are from the states, so there’s not a lot of information about available Canadian products. So I had to research a little bit more to understand what types of projectors I am looking for, instead of specific products.
Calibrating
The boom I got was super sturdy and absolutely amazing! I also bought a panoramic head as I saw in the FB group. The setup was enough to throw to my A1 cutting mat.
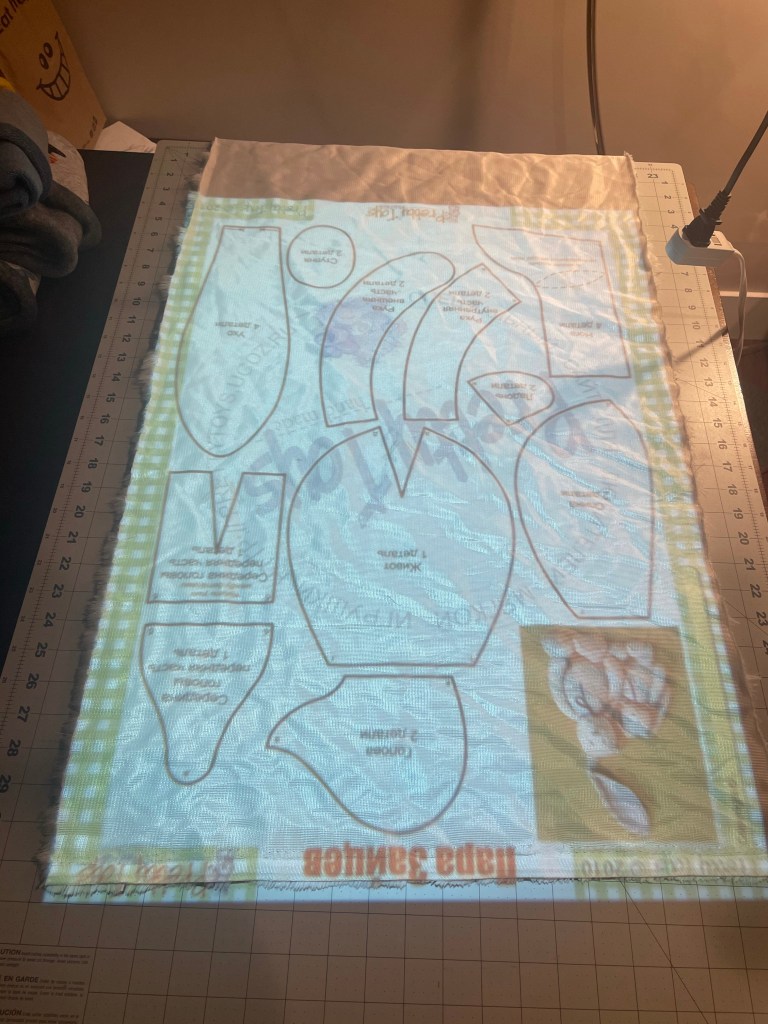
I must say, to calibrate to almost perfect was pretty easy, but it was late and I just wanted to check if everything is working and I don’t want to return anything to Amazon, so I left it like that and didn’t cut anything that required too much precision – a toy bunny!

I found that pattern online in a Russian website with minimal amount of instructions, but just this picture.

What’s cool about projectors, that I can make the image as big or as small as I want on the mat! I just need to zoom in or out on my laptop.
Cutting
I could’ve transfer the image to paper, but I was in experimentation mode, so I decided to cut directly on the fabric.
Since the pattern didn’t come with instructions, I made a couple of mistakes of cutting fabric twice when it was supposed to be mirrored. Lucky I had plenty.

With this method, it’s absolutely crucial to use some sort of fabric weights to keep your fabric from moving around.

Did I choose the best fabric for this experiment? No, I did not!
Pitfalls
Beware of the boom
I moved around the table a lot, which resulted in me hitting the boom multiple times. I got it mostly in my eye and head. But the pain was not as bad as the disappointment of the projector getting out of calibration.
Rotary cutter
I have a 45mm rotary cutter, but I think that for smaller projects I should probably get a smaller one – that will make the cutting easier around the curves.
Software
I was using my work MacBook Pro to project the picture and calibration picture but the default Mac pdf software was not comfortable at all. I only had some very basic features that were enough for the bunny project but I guess will not be enough for anything a little more complicated. Also – the laptop kept turning off which was a real bummer!
Wasted fabric
I found it a little harder to plan the cutting more efficiently and using the maximum amount of fabric. When you have your paper pattern pieces cut out you can lay your fabric, and play with the paper placements until it makes sense. Here, I believe it can be done eventually, but will require more practice.

Bottom line (or – show me the money)
Does it really a good investment? Let’s look at the breakdown of all the things I got for that project:
CDN$ 39.99 360 head for boom – https://amzn.to/3fk7GLQ
CDN$ 159.99 Boom – https://amzn.to/31kSuWJ
CDN$ 149.99 Projector – https://amzn.to/2QD3GM1
CDN$ 22.99 HDMI Cable – https://amzn.to/3d8WAXs
CDN$ 54.04 Self healing board – https://amzn.to/3lTINIh
Total: CDN$ 427
Let’s compare to printing. I didn’t count all the sheets of paper I had in the bucket of A0 patterns, but I estimate it to be around 30 sheets. Each sheet is $8 so it come up to $240. Then I have the tracing paper rolls that are hard to estimate because they are lasting for a very long time. People who print at home will have a different estimation of paper and ink (which can be very expensive).
So the bottom line is that the projector is a long term investment and commitment. And for a person like me that has about $240 worth of paper patterns in a year – it seems like I’m going to return the investment in about 2 years. On the other hand, knowing that I eliminated the tedious process of printing and tracing – I may sew way more! It is, after all, a great time saver and I am super excited about the next projects I am going to make. Since setting up and calibrating takes some time, I will be probably having a “cutting weekend” when I will just do prepping and cutting with the projector, so I will have multiple projects that are ready so sew.
I hope you liked this post! Will be updating on the bunny in the next one

Thanks for sharing your Canadian grown setup! Exactly what I needed. Also love the storage of the AO patterns – can’t believe I hadn’t considered that, as well. 🙂
LikeLiked by 1 person
Hopefully that bucked will stay abandoned from now on 🙂
LikeLike